

Hiii!! Looking for some tips on styling and shooting your own product images for social media?
Whether you normally shoot your product on your own and you’re just looking for some new tips & tricks or you normally work with a product / branding photographer and socially distancing means you can’t right now and you need to figure it out on your own, this post is for you.
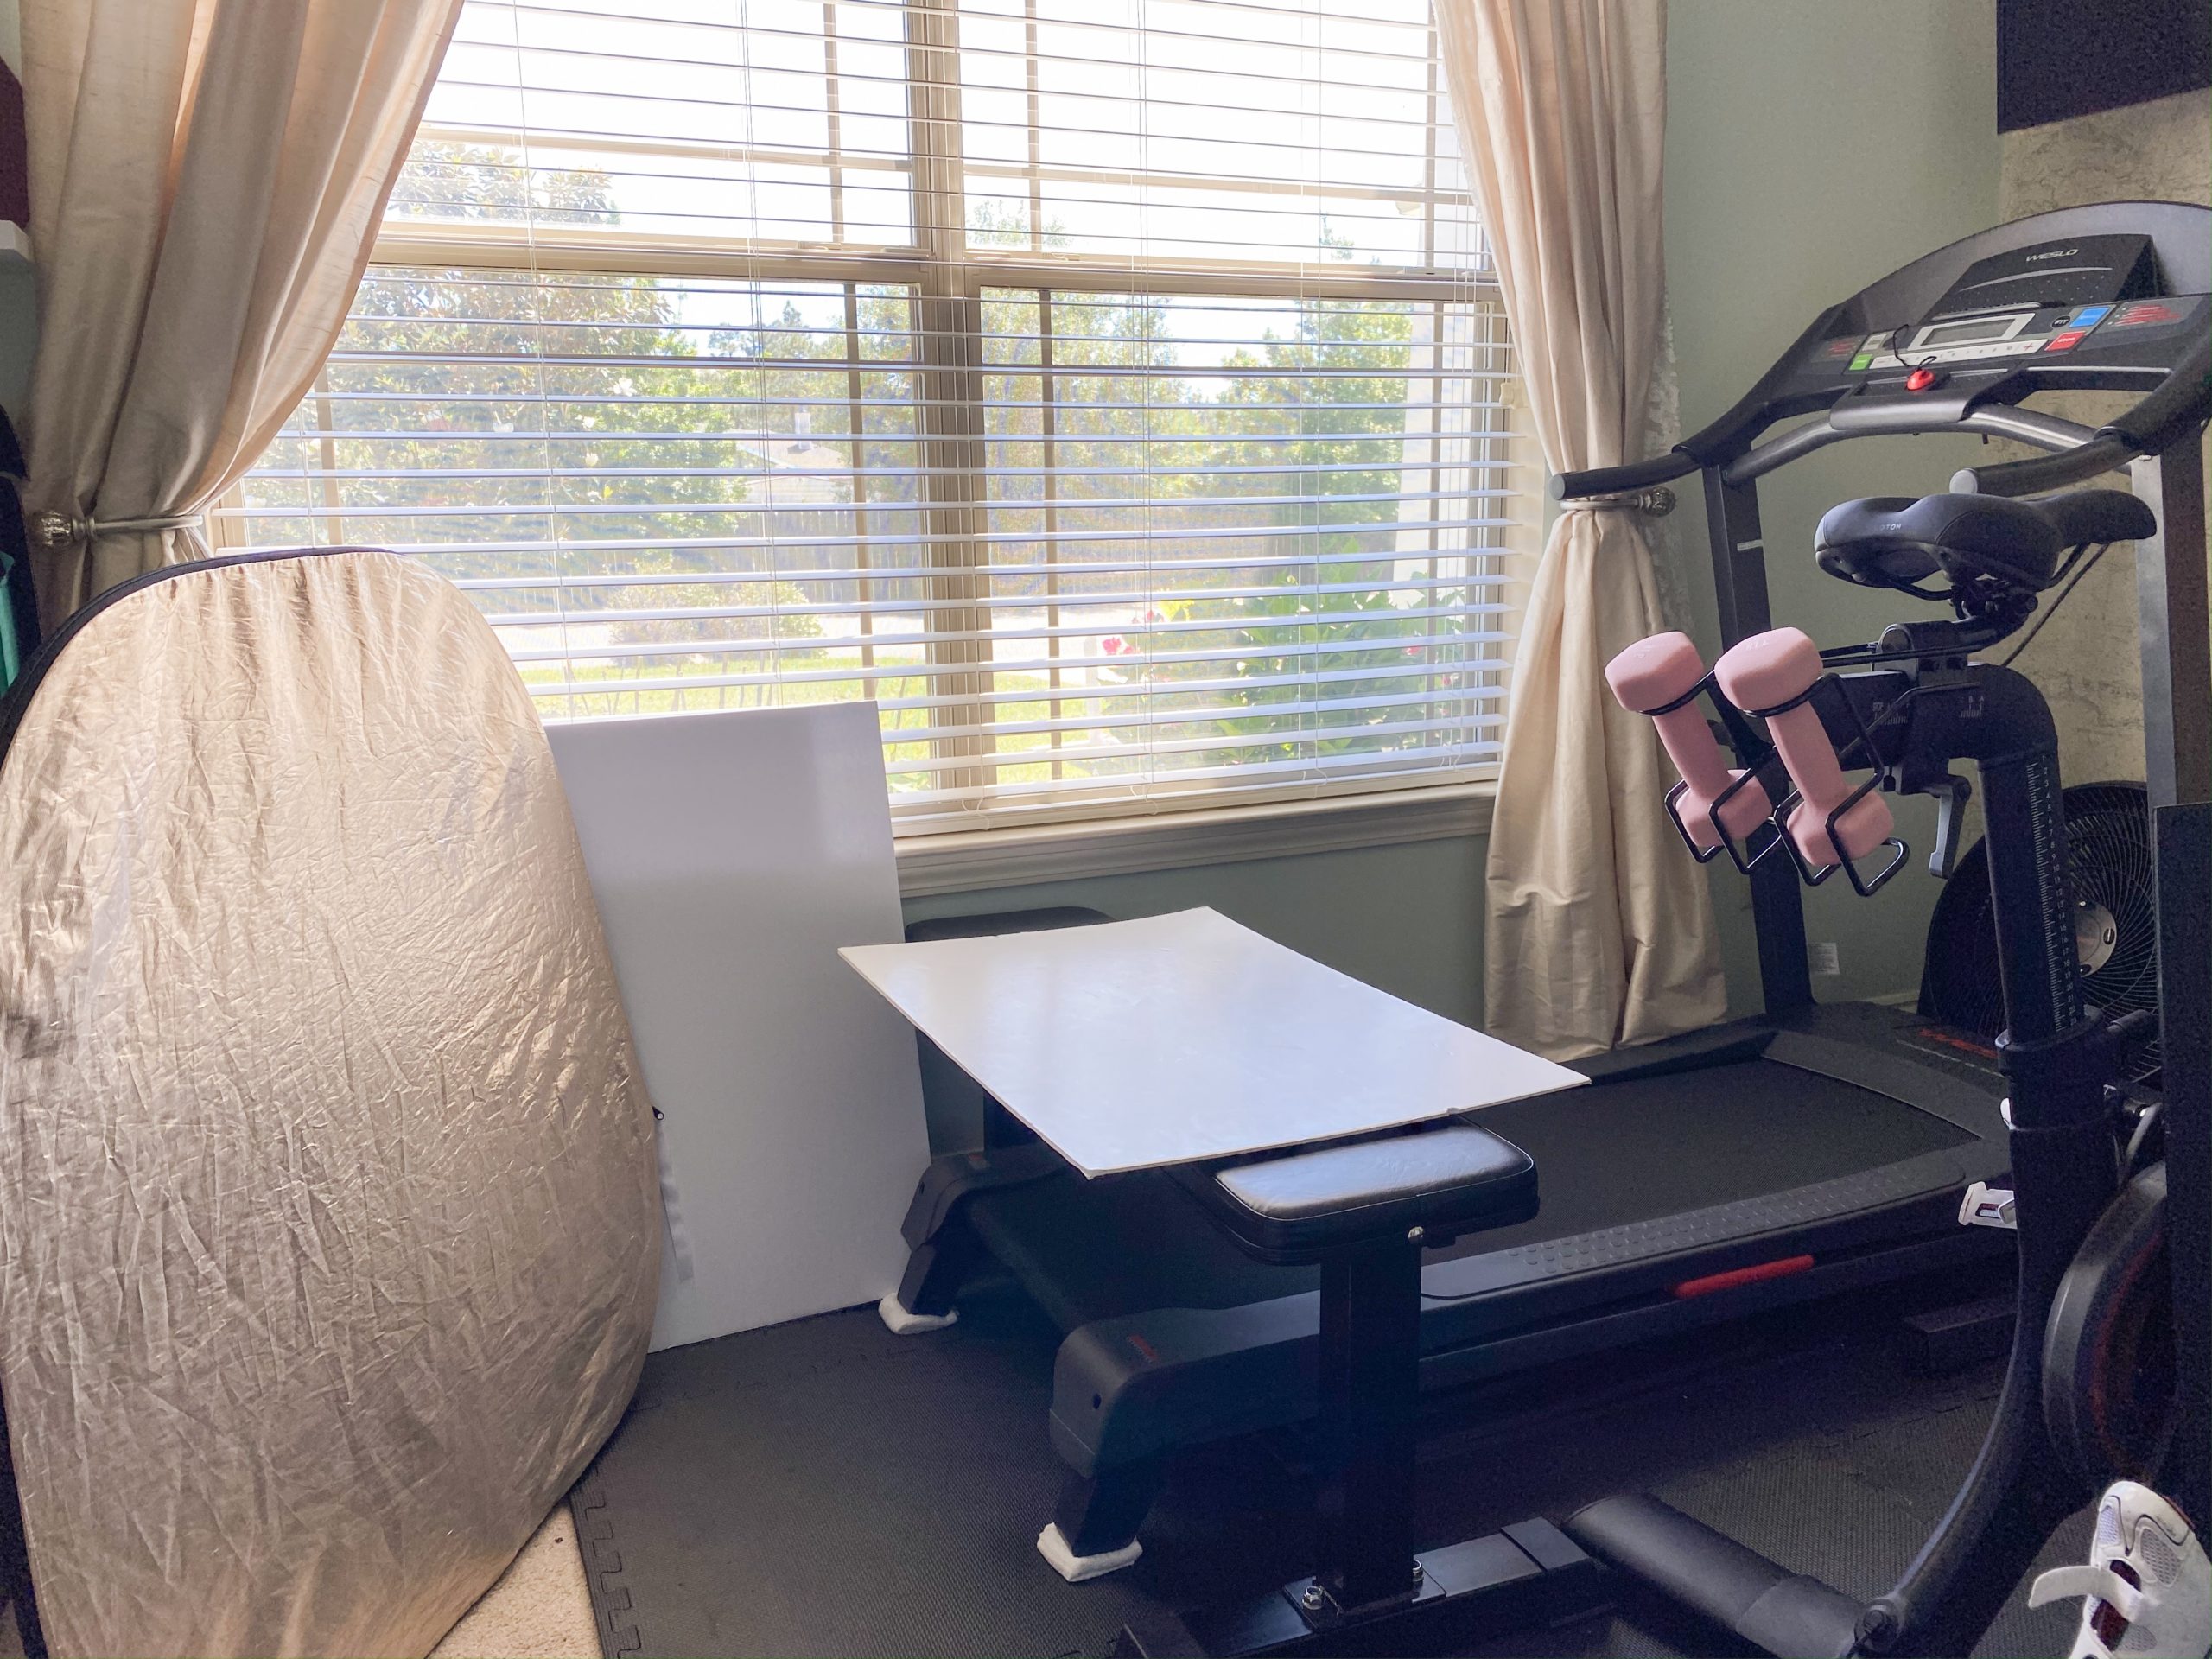
I’m sharing some tips & tricks + my setup and must-haves for shooting styled flatlay and product images in my home office. Literally my setup is almost always just balanced on top of my treadmill, so I promise this isn’t fancy and you can make the space you have work!
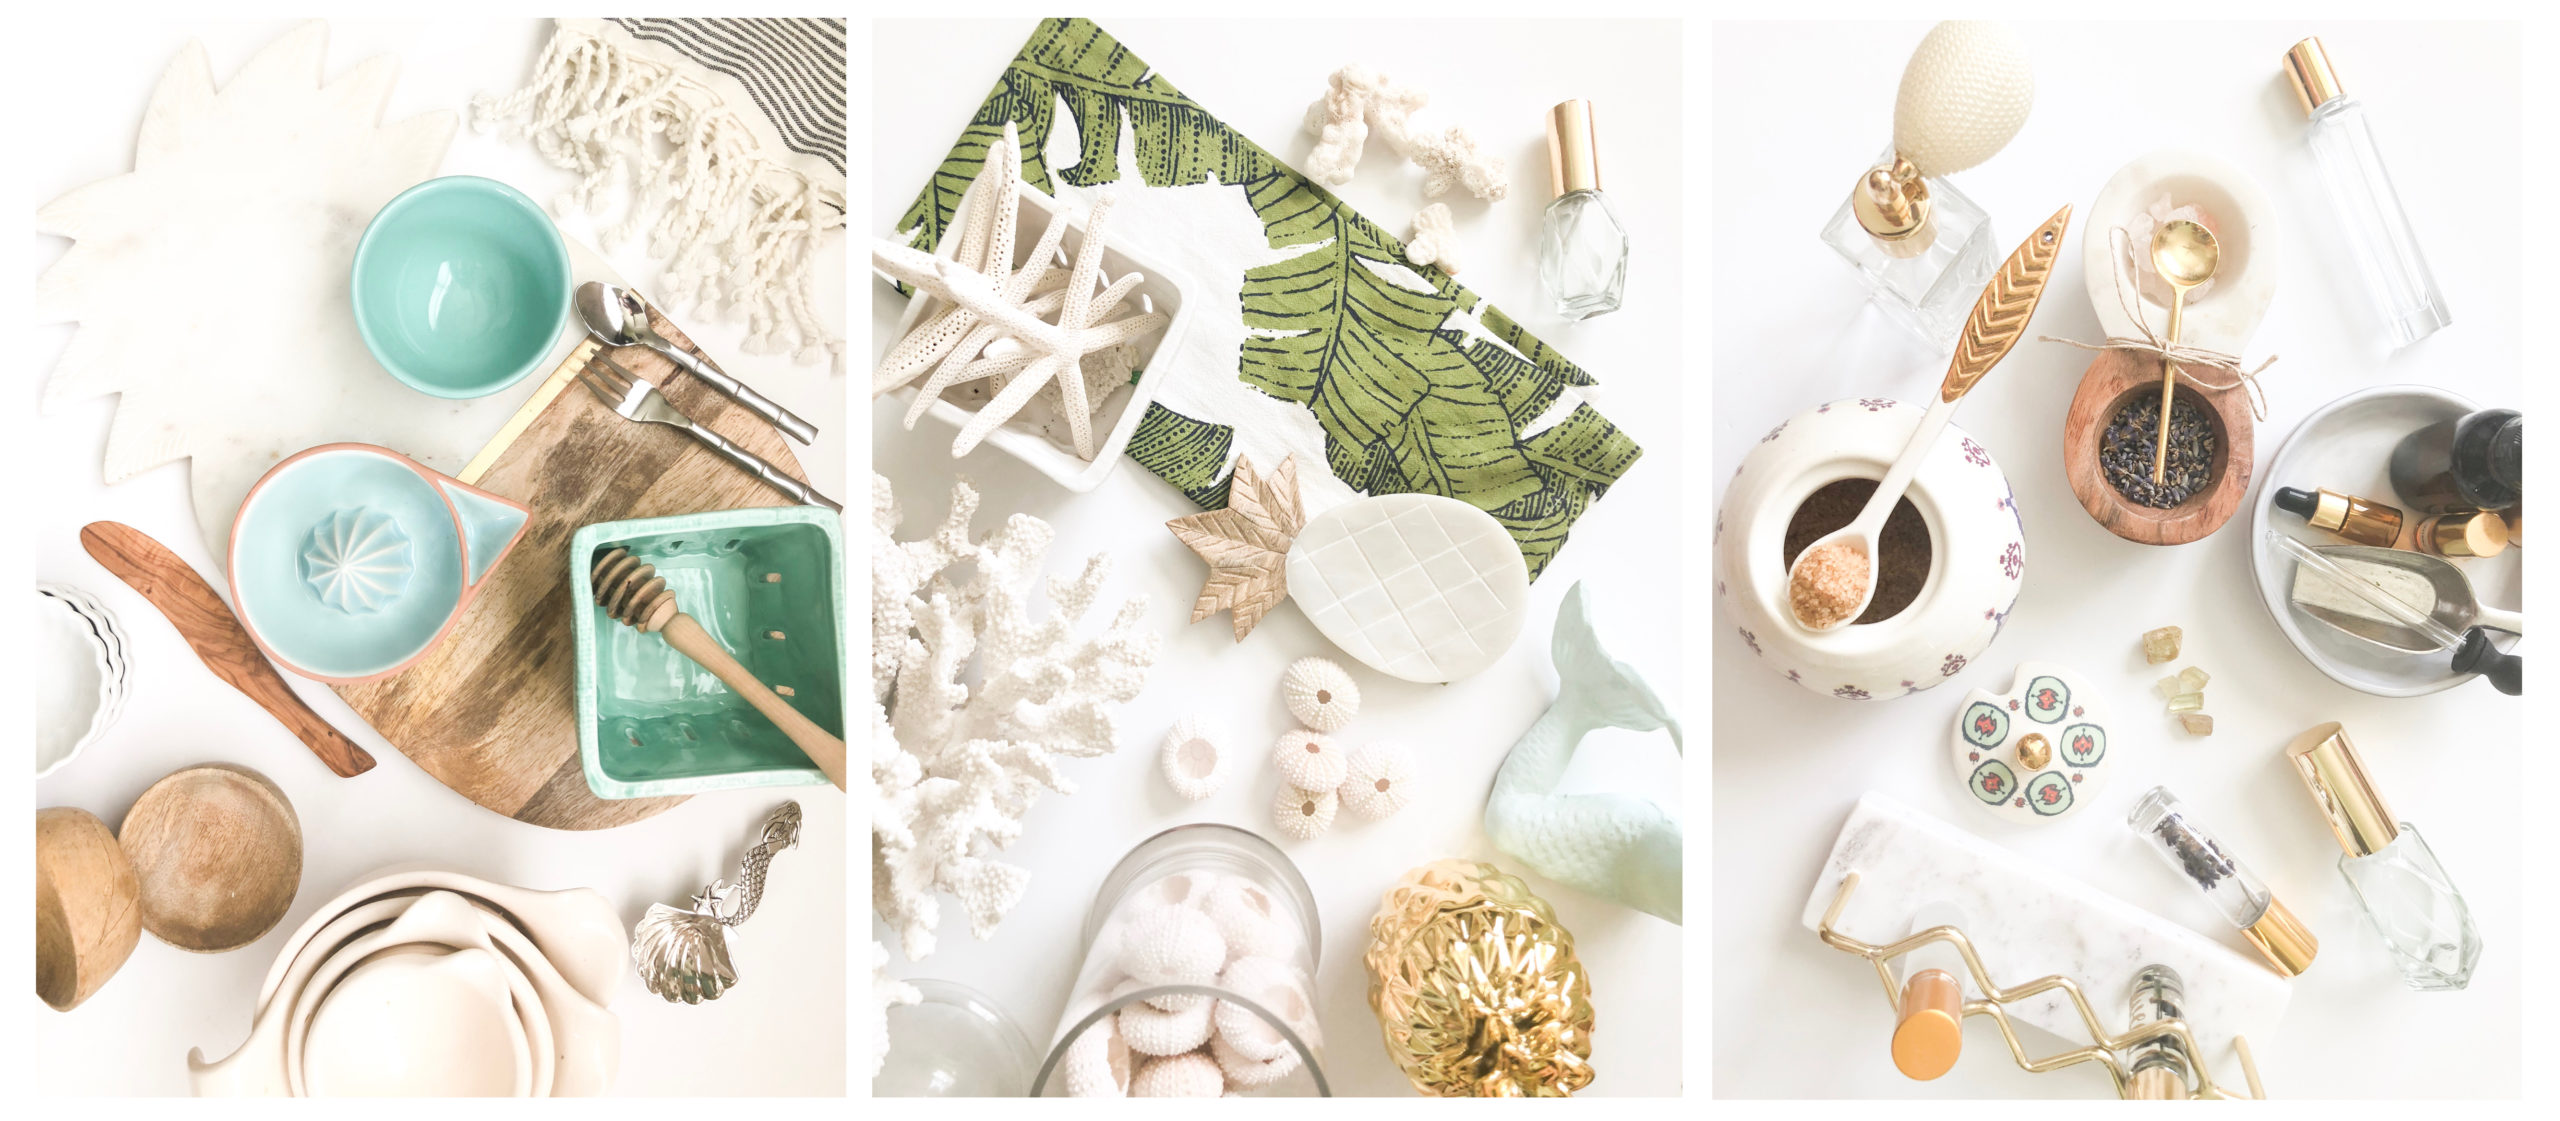
Before you start, gather your materials, products and tools and make a quick outline of what you need to shoot. This helps to make the most of your time.
Gather any props you’ll need for this shoot from around your house. For example, if you sell hand painted tea cups, you may want to gather some loose leaf tea, a tea strainer, maybe a yummy biscuit to stage with your product. The idea is for your props to fit with your brand aesthetic and also make sense in the photo.
What story are you telling? What do you want to communicate to customers and how do you want them to envision themselves enjoying your product? Props should make sense and not just be there because they’re trendy. Confusion kills the sale.
Keep in mind scale/size of your products too to prevent props from looking out of place. Props are there to communicate a message but not draw too much attention. Your product should be the star of the photo.
Pro tip: pull in any other products you sell that make sense to incorporate into the shots (hello, up-selling).
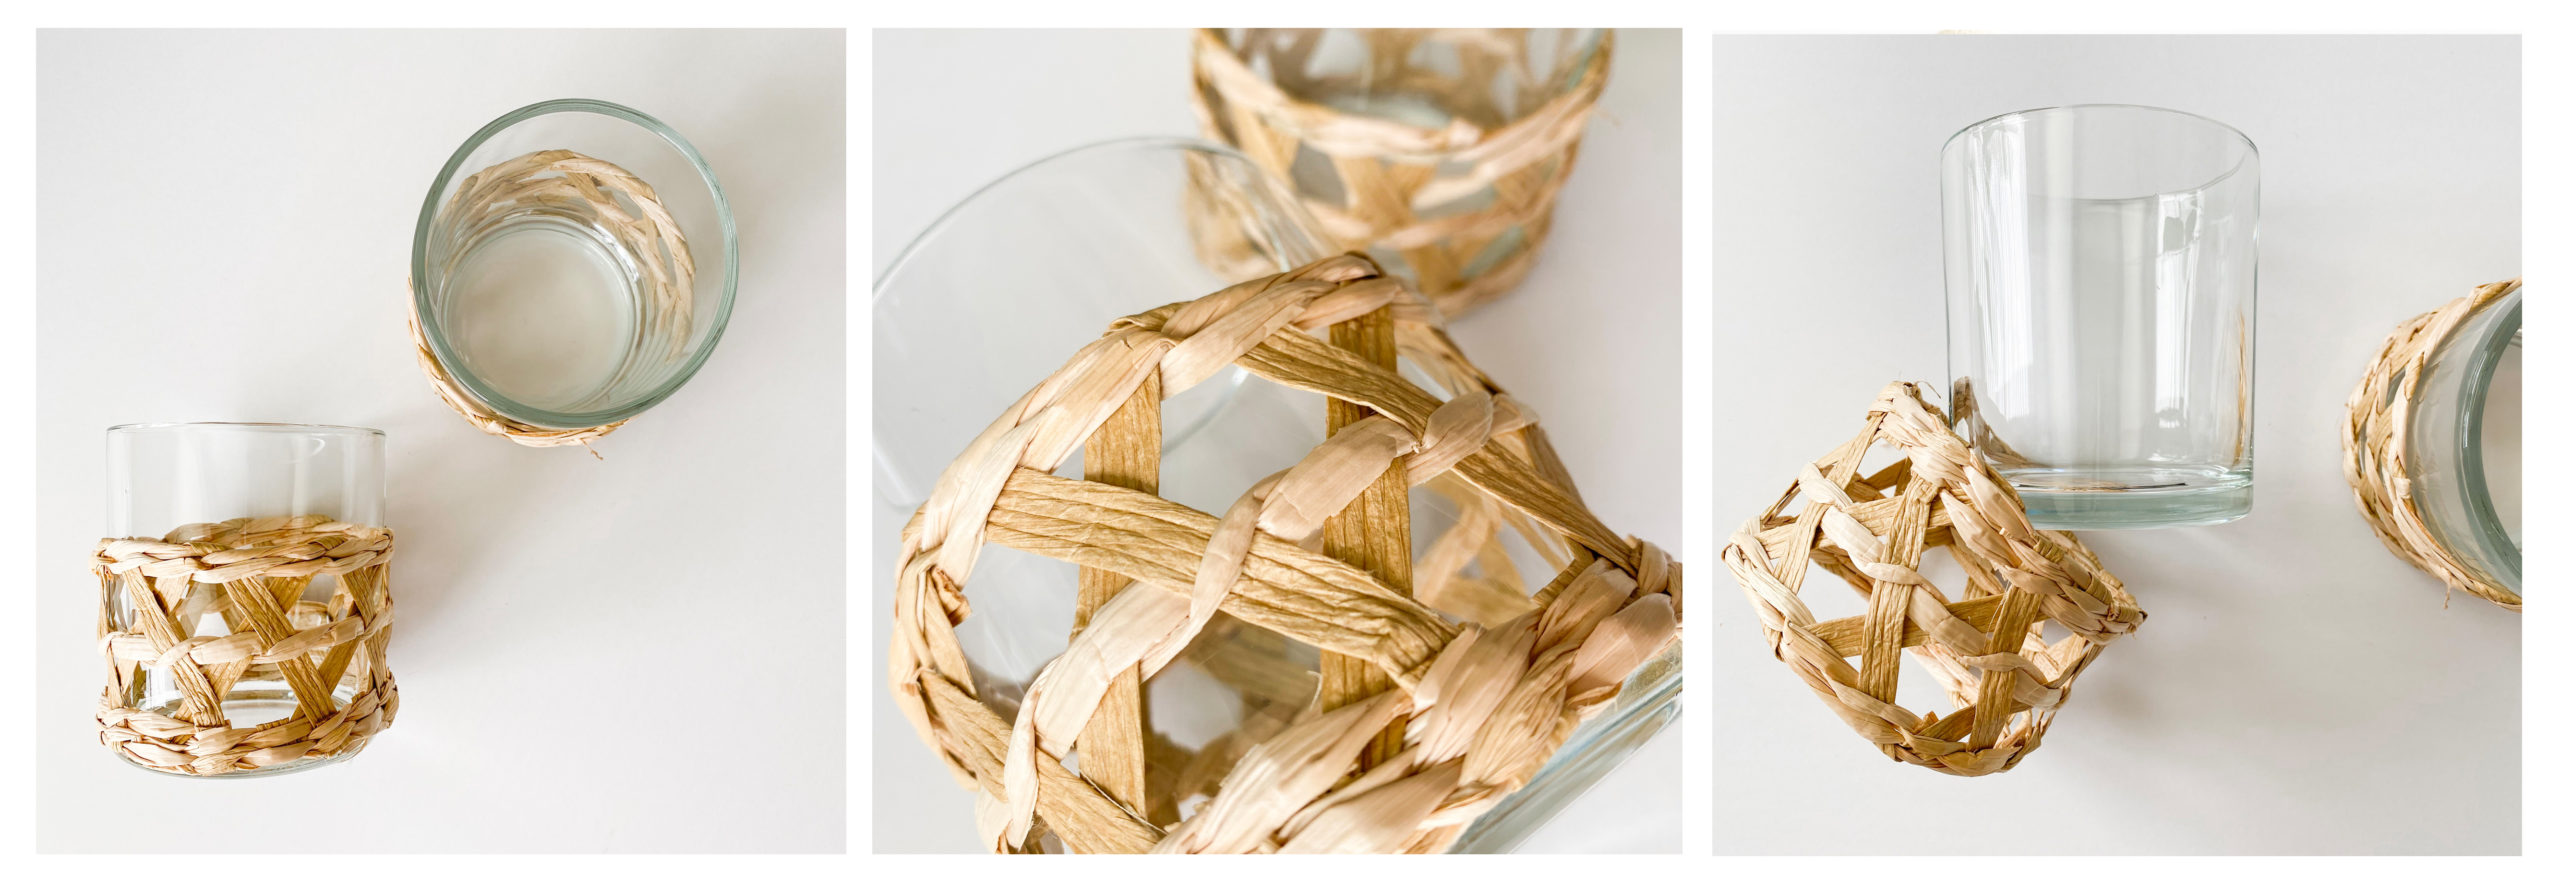
Now, take a look at that list you just made. Think of each product you’re going to shoot in turn. Make a list of any details or unique features that need to be showcased, like a gold foil element, a textured paper, or a removeable embellishment and plan to take a supplemental detail shot that specifically draws attention to that.
For example, it’s awesome to share carousel posts on Instagram in which the first image is a beautiful flatlay and you include a swipe through of close up “fragment” shots featuring different elements of your product.
How to choose the best spot for shooting your products at home:
You’re going to want to choose your location based on the best NATURAL light in your house. I have a friend who shoots all of her images in her master bathroom tub, because that’s where the best light in her house is. Seriously. I’m telling you, this doesn’t have to be fancy.
As for me, I shoot in my office 95% of the time, because it just happens to have the only south-facing windows in my house and therefore, the most even light throughout the day, during my regular work hours. But as you’re going to see a little further down, my “office” is also my workout room and my “studio” is literally propped on top of my treadmill. You can do this. Promise.
Back to finding the best light…
Light is everything. It will literally make or break your photos. Don’t try to shoot when the light is terrible and just fix it in editing. You can always tell the difference between a really well lit photo and a really NOT well lit photo. I get the question all. the. time. “how do I edit a photo shot in really dark or artificial light to look bright and airy?” The answer: you don’t. It’s next to impossible to fake bright and airy light in a photo.
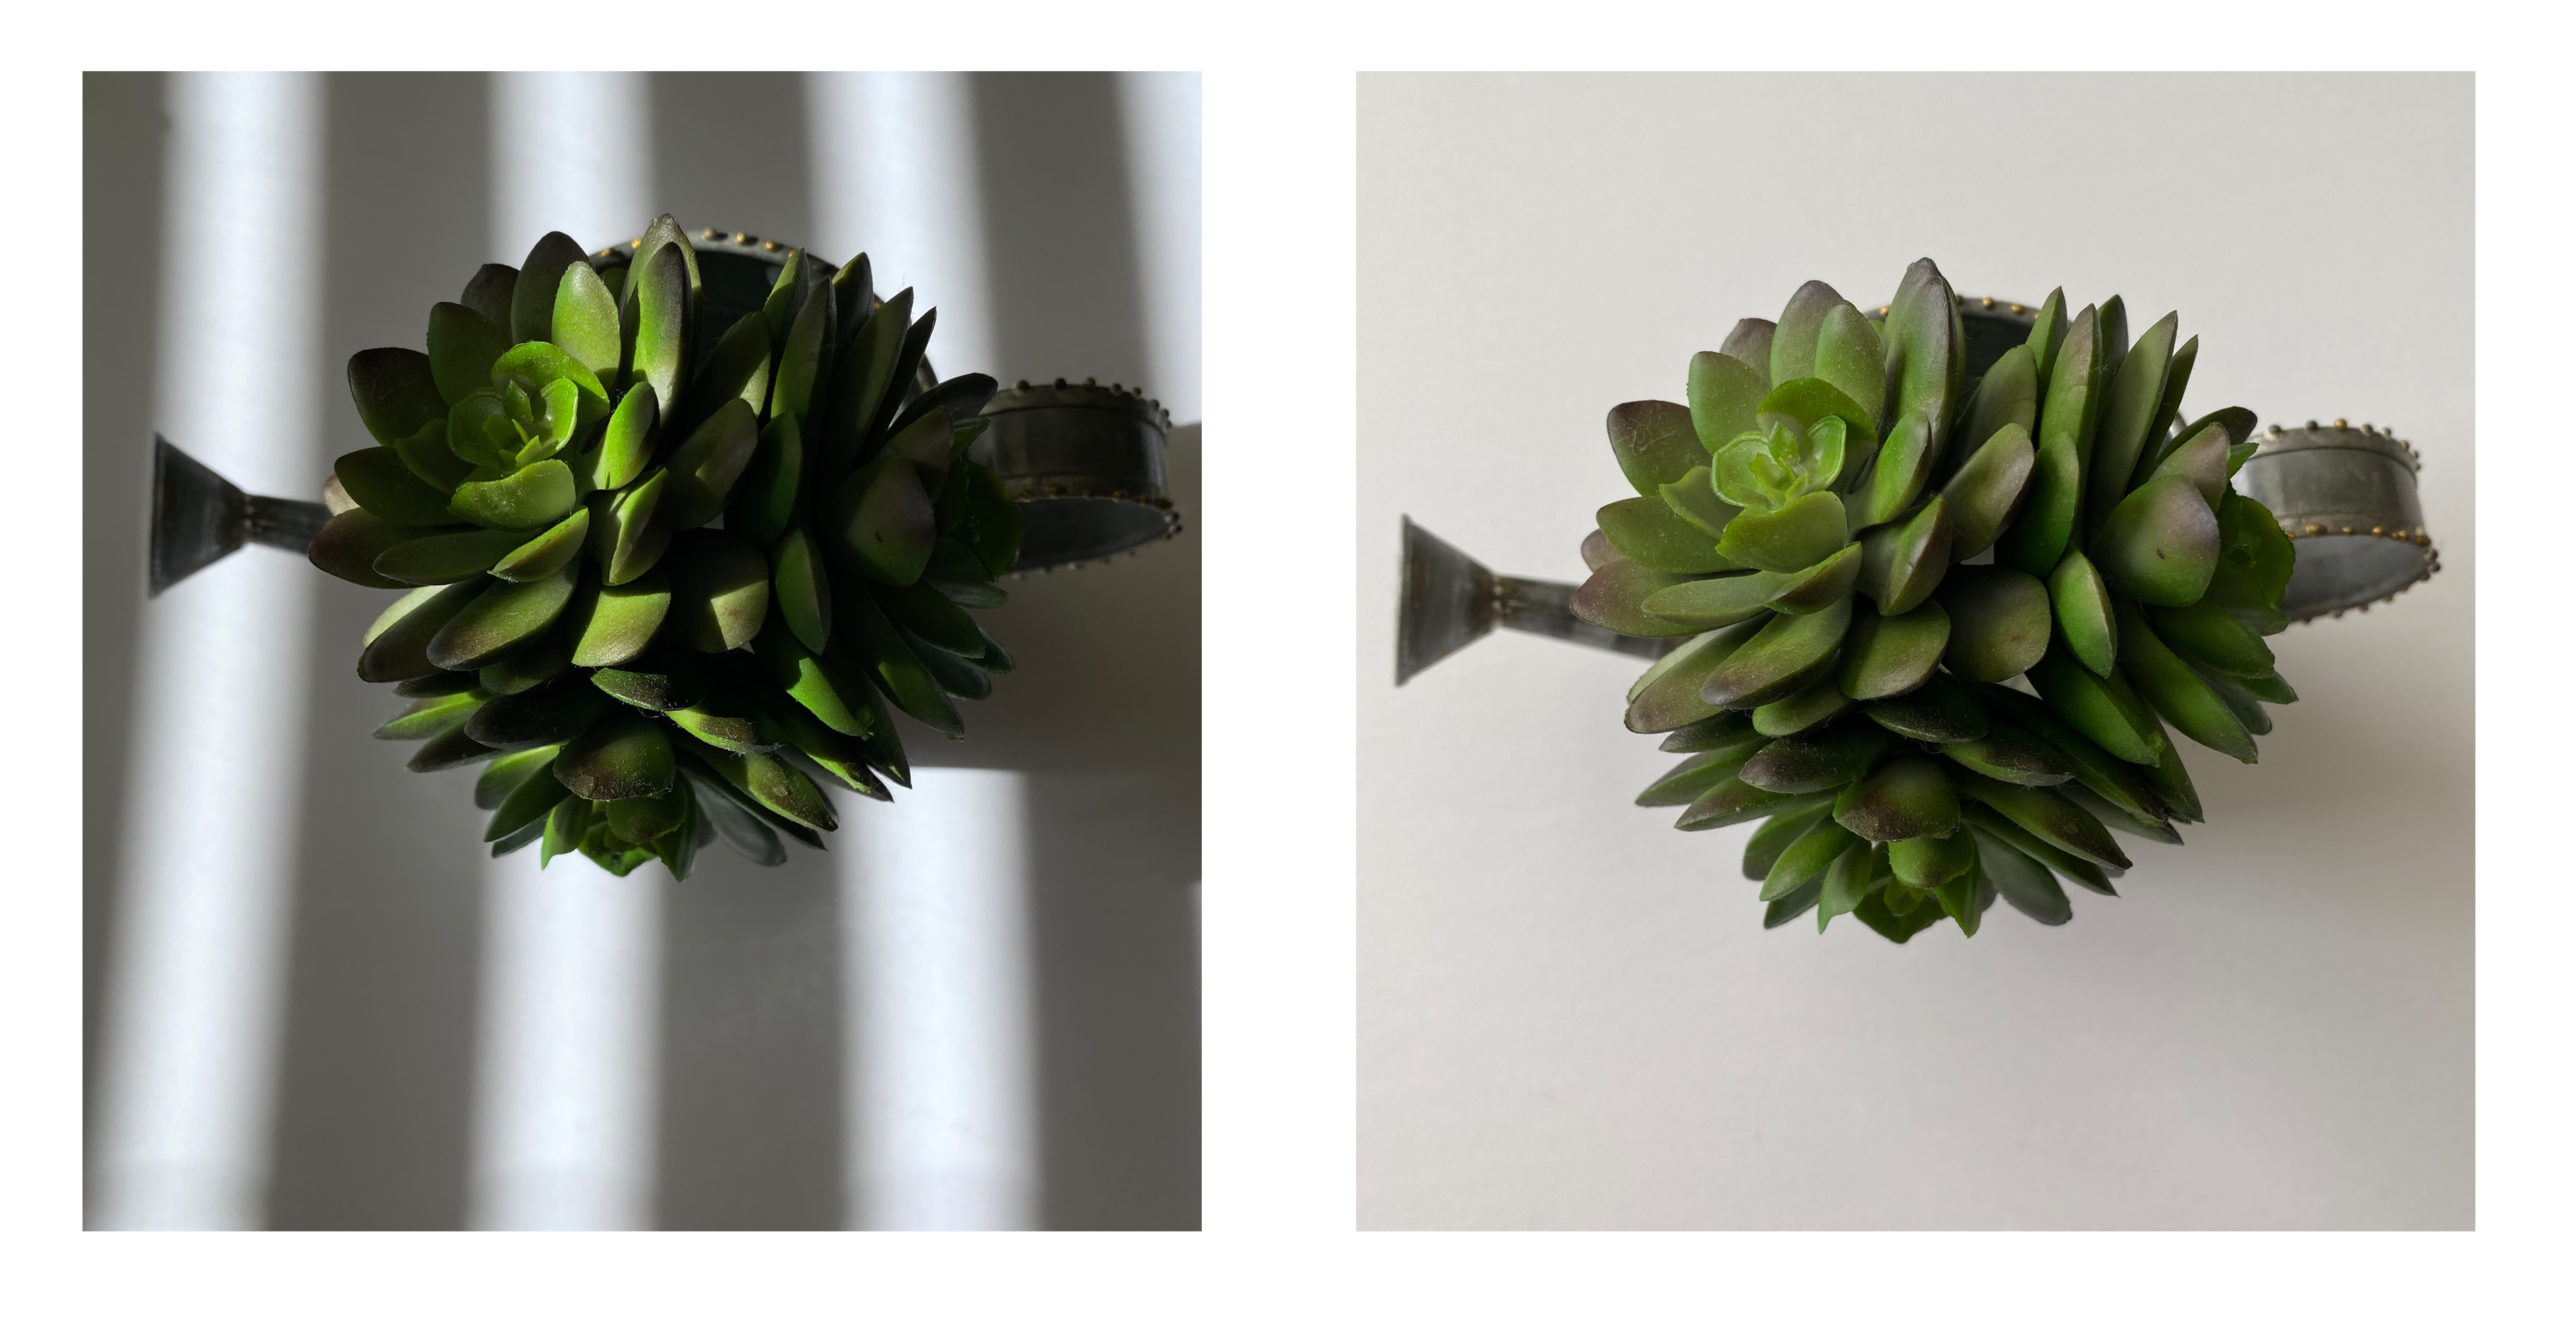
See the difference between shooting this image below in good light and shooting it in poor light + trying to correct by editing after the fact:
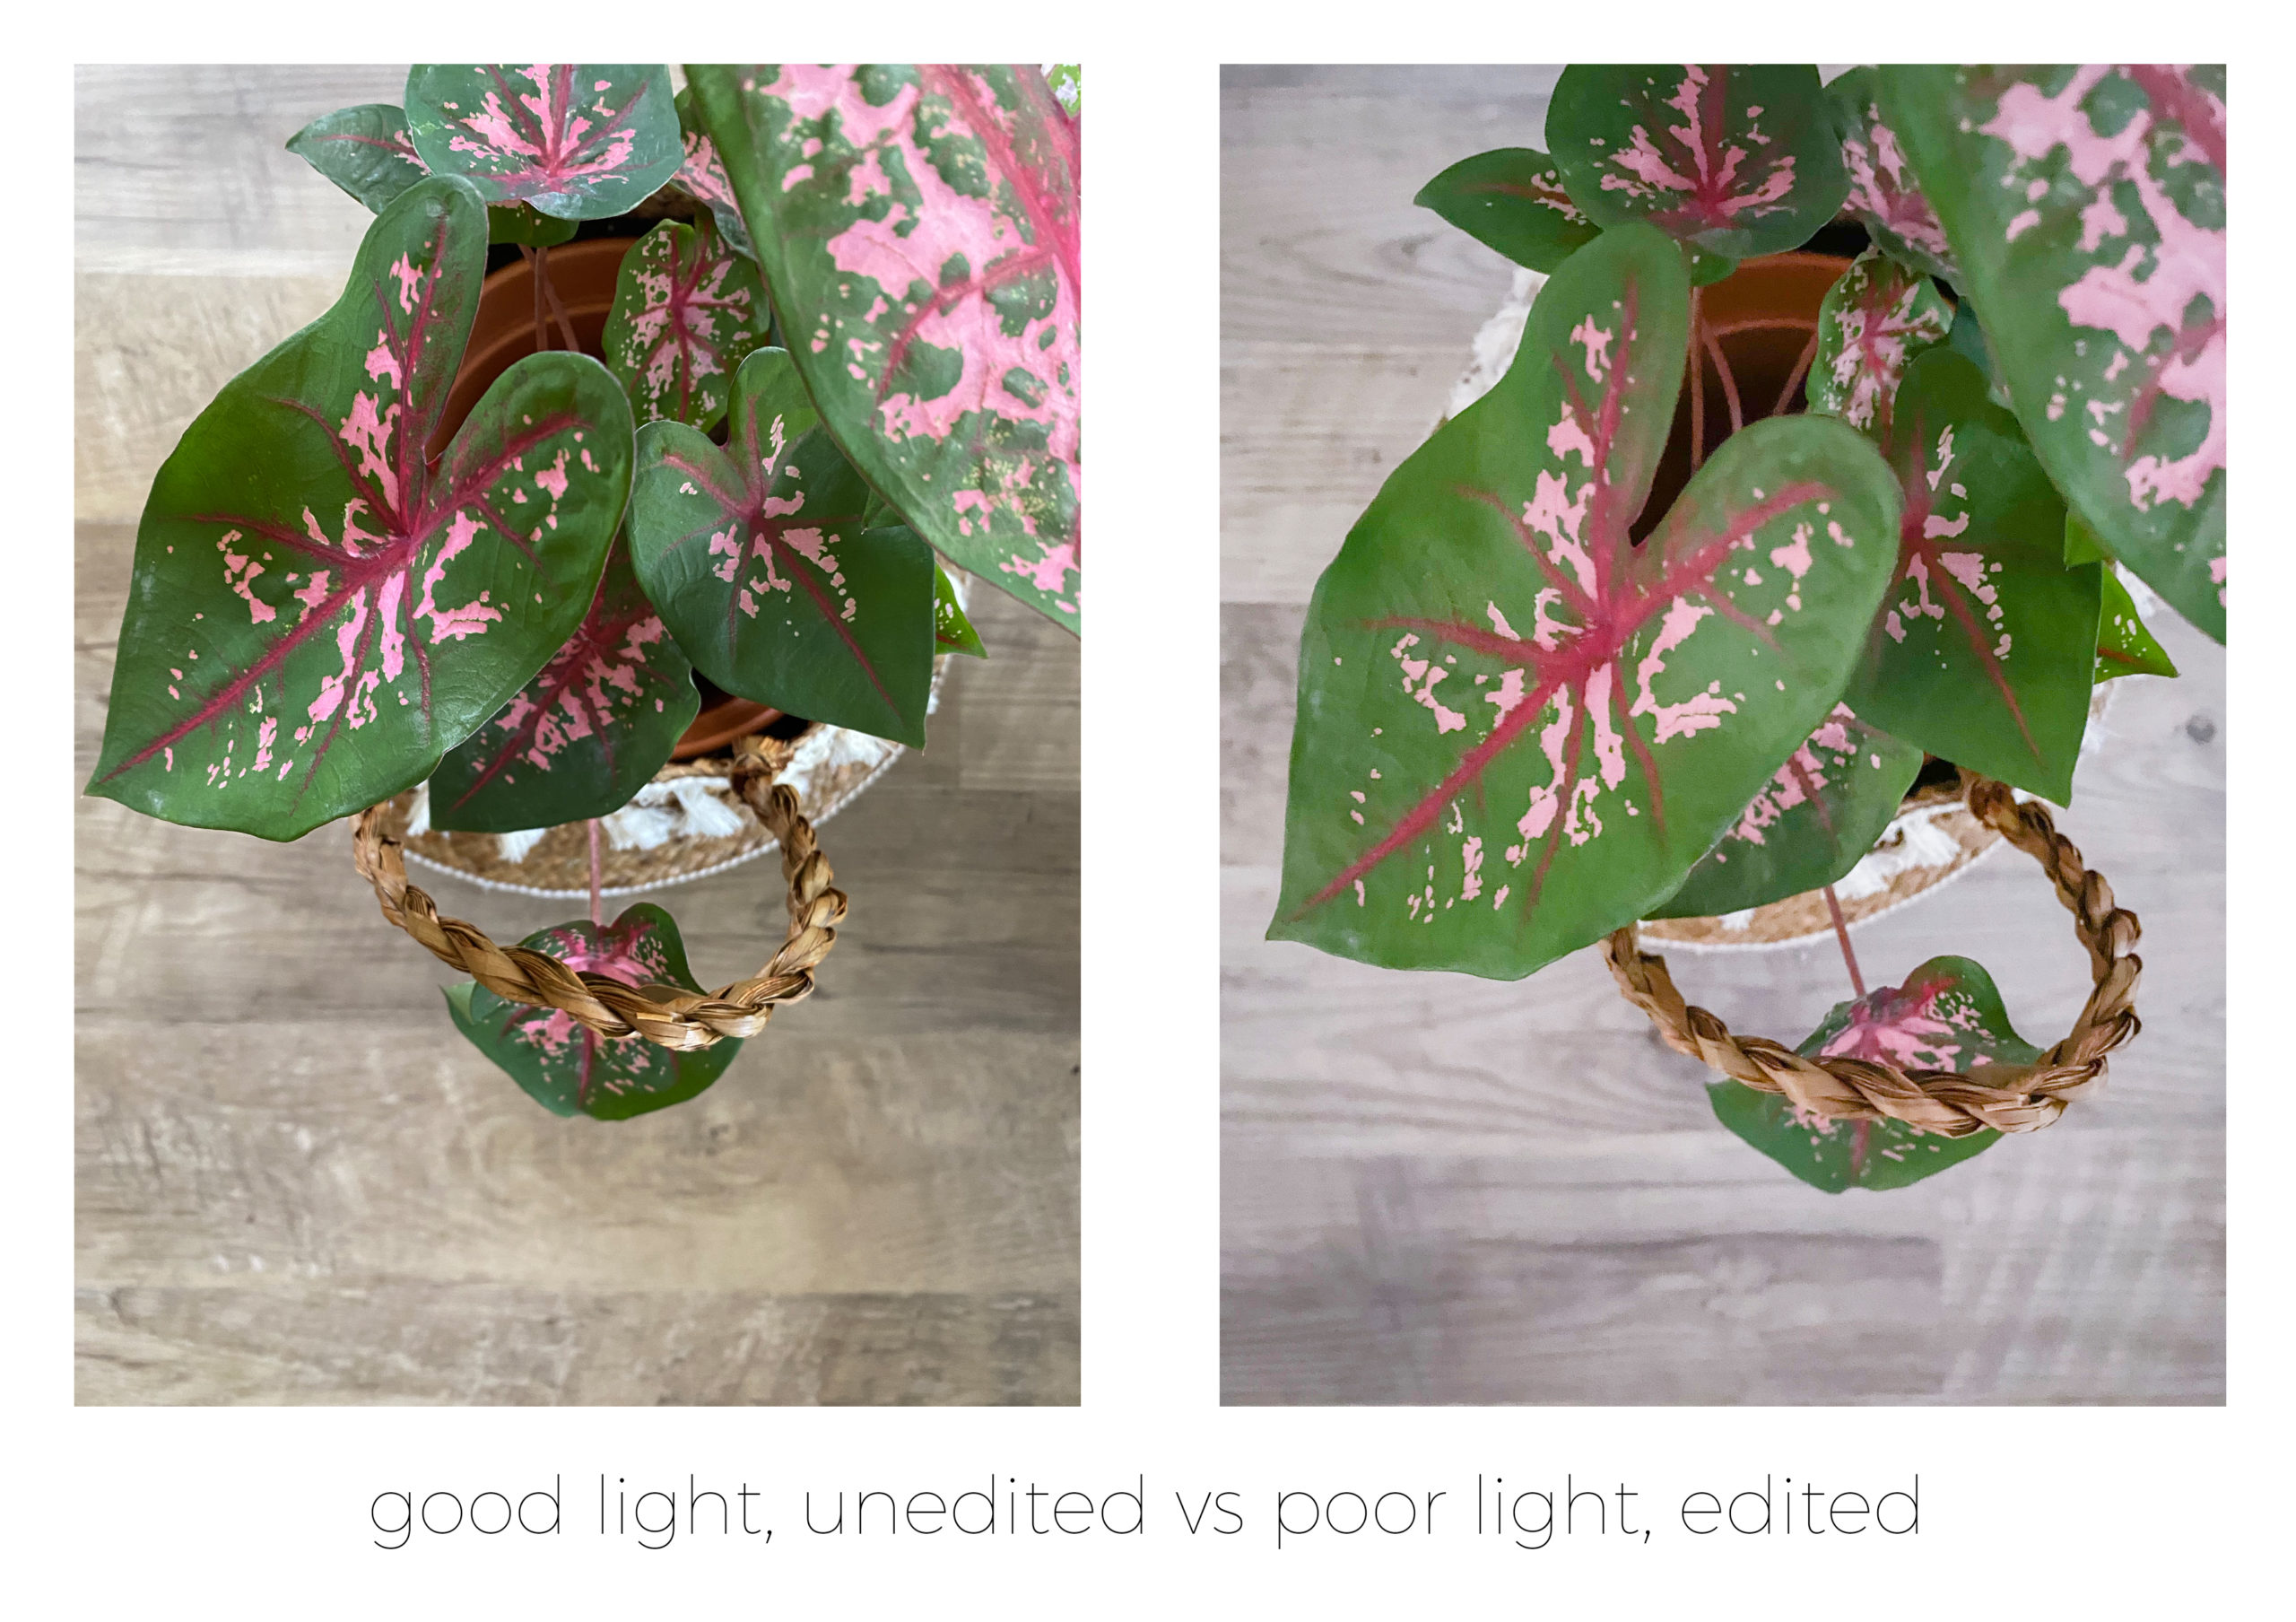
The photo on the left is shot in good light. Unedited. The photo on the right is shot in poor light and edited to try to brighten it up. Looks okay, but not as good as the one shot in great light. You lose a lot of the detail and dynamic color range.
If you’re curious what the one shot in poor light looked like before it was edited, here’s a side-by-side of all 3 images: well lit, unedited – poorly lit, unedited – poorly lit, edited

Now. If you’re thinking “okay, so why not just turn on the overhead lights?” Don’t do it. Just trust me. If you’re wondering if there is really that big of a difference in shooting natural light vs artificial/ambient room light, here are two examples:
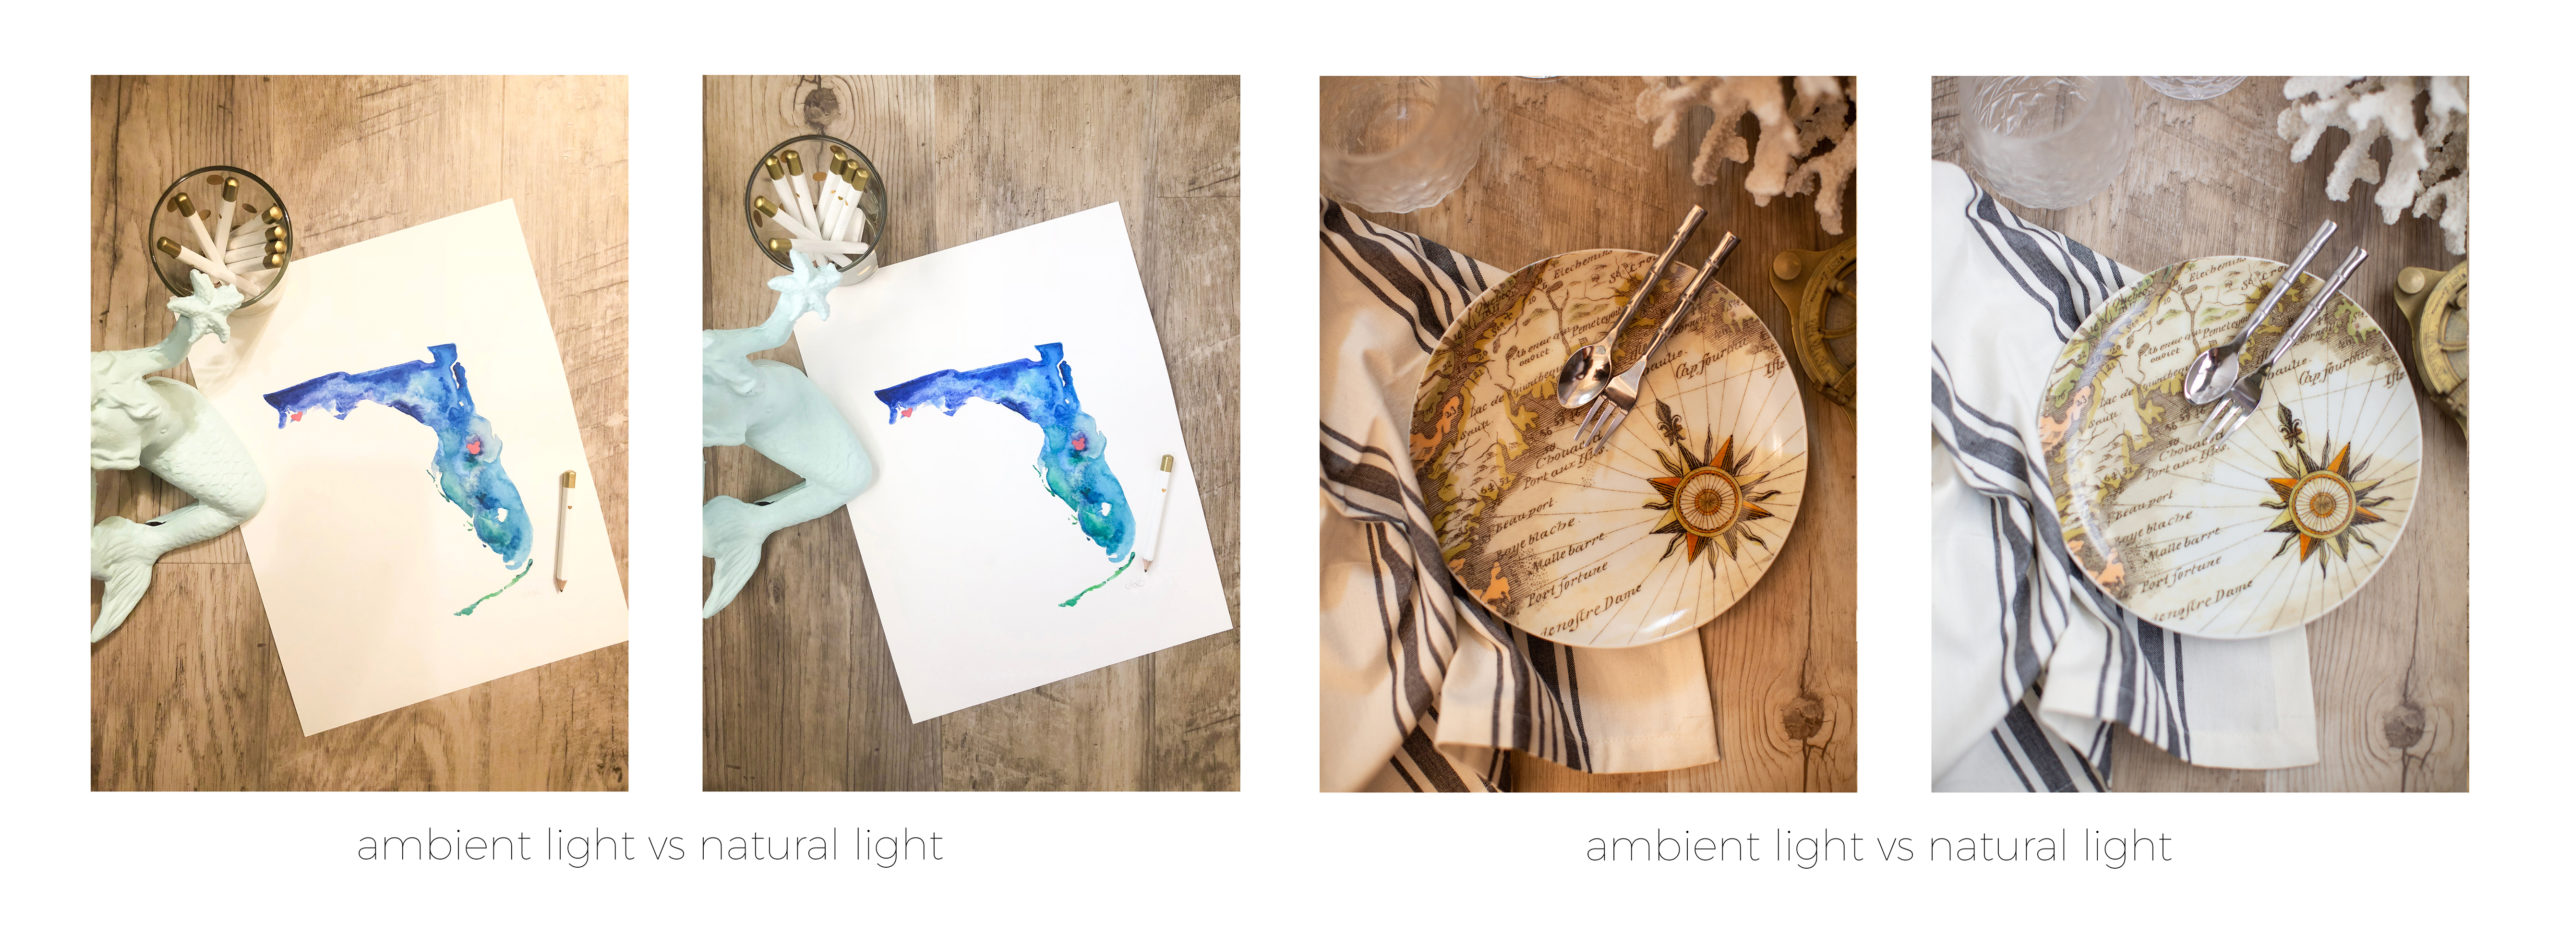
As a maker/seller of products, it’s really important that your images correctly communicate what you’re selling. That means true to life color and excellent detail. Bad lighting can really mess that up.
This is literally my #1 most important tip. If it’s nighttime, wait til tomorrow. Natural light is key.
You can plan to shoot your overhead/flatlay photos in the best light and if you’re in need of supporting images of that product being used “on location,” you can then shoot those where they make sense, keeping in mind the time of day that the light will be best in that room.
For example, this flatlay of this sugar jar was shot in my office because that’s where I have best light. I then moved to the kitchen for the “lifestyle” shot of it, because that’s where it would be used.
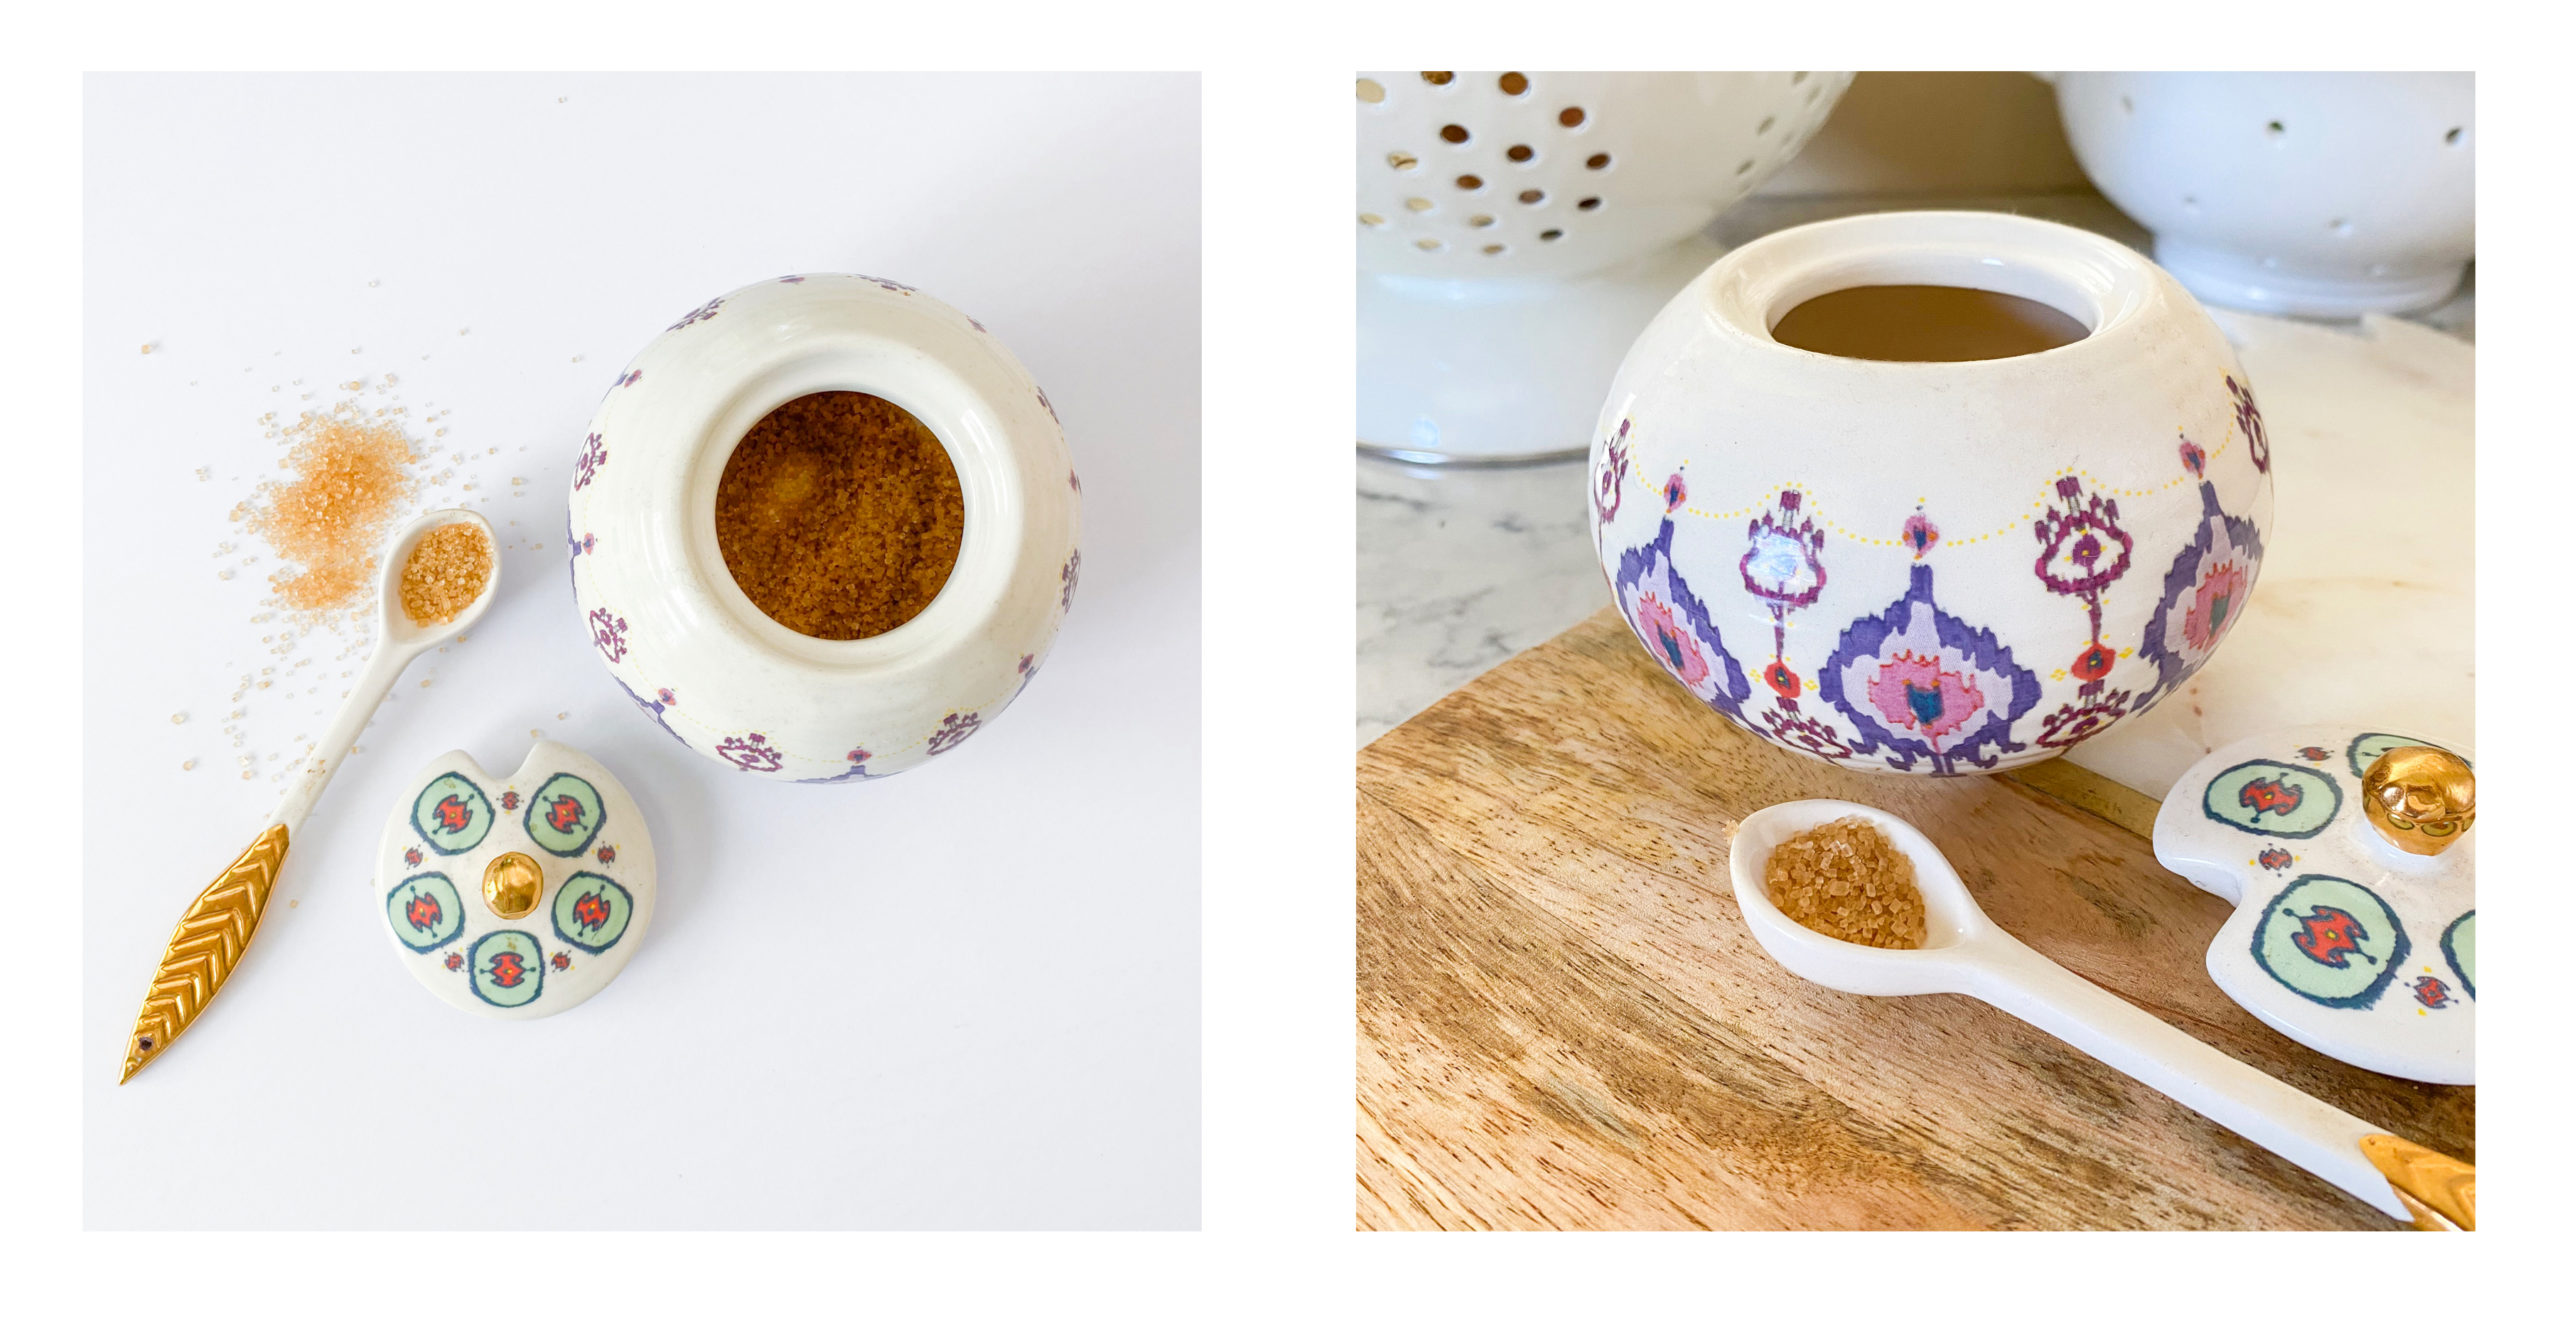
The light isn’t as good in the kitchen, but that’s ok, because this isn’t an “on white” shot like the flatlay is, and I still waited for the best light of the day, brought in a reflector and made the most of the natural light… speaking of which…
How to make the most of that natural light:
Get close to the window. I personally shoot on top of a bench because it gets me closer to that window light. Literally this board is sitting on top of a weight bench which is currently straddling my treadmill. I don’t have a dedicated studio space. You have to have one either. (If you CAN, it’s definitely a bonus!!)
If you don’t have a bench to elevate your shooting space, you can pull 2 chairs together!
Adjust the light quality in your space using the blinds, if you can. You want light that falls evenly on your subject and doesn’t create harsh shadows. Direct sunlight blazing onto your product isn’t ideal. If you can see the shadows from the slats of the blinds, that’s also going to be a problem, unless that’s the look you’re going for.
Make sure you turn off all ambient room light. Artificial light creates weird color casting that is very difficult to correct for. I always recommend shooting all natural light. I know we talked about this above, but it’s worth repeating!!
And now for the next biggest difference maker, just after choosing the spot with the best light… bounce light back into your shadows by using a reflector of some sort, whether it’s a white poster board or an actual reflector. Speaking of tools & gear…
Get your space ready.
I always shoot on a piece of white foam core board. You can buy this very inexpensively at any craft store or on Amazon.
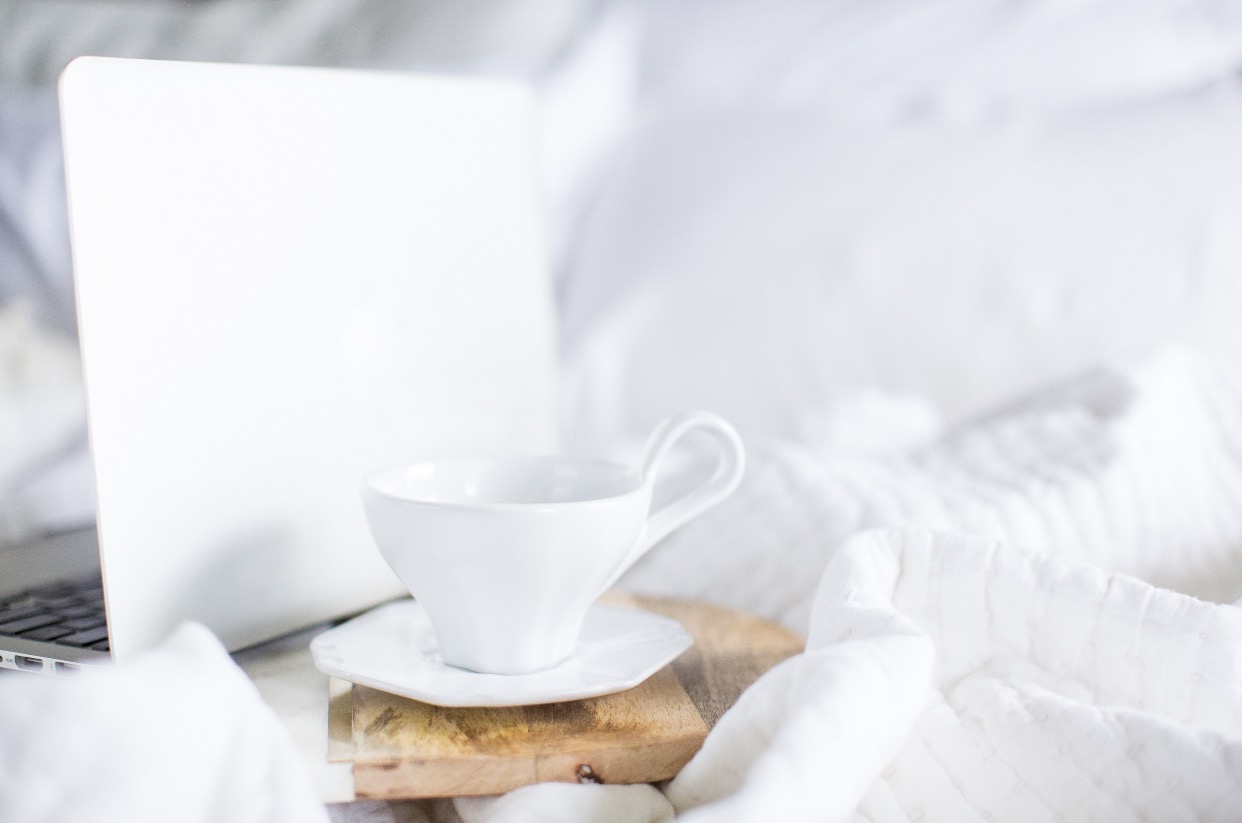
Next I set up my reflector. Because I shoot product & brands for a living, I have a whole array of reflectors (see below for my complete gear list), but you can just as easily prop up inexpensive pieces of white foam core board to bounce light and fill in your shadows. I’ve even used a pillow in a white pillowcase in a pinch, like in the photo below, shot in my bedroom.
You’re going to want to set up your reflector(s) opposite of your light source. Here is what my setup looks like when I’m shooting overhead aka “flatlays.” If I’m shooting from a tripod, then the legs of the tripod help to hold the reflectors in place… otherwise, they’re just propped up. Not fancy.
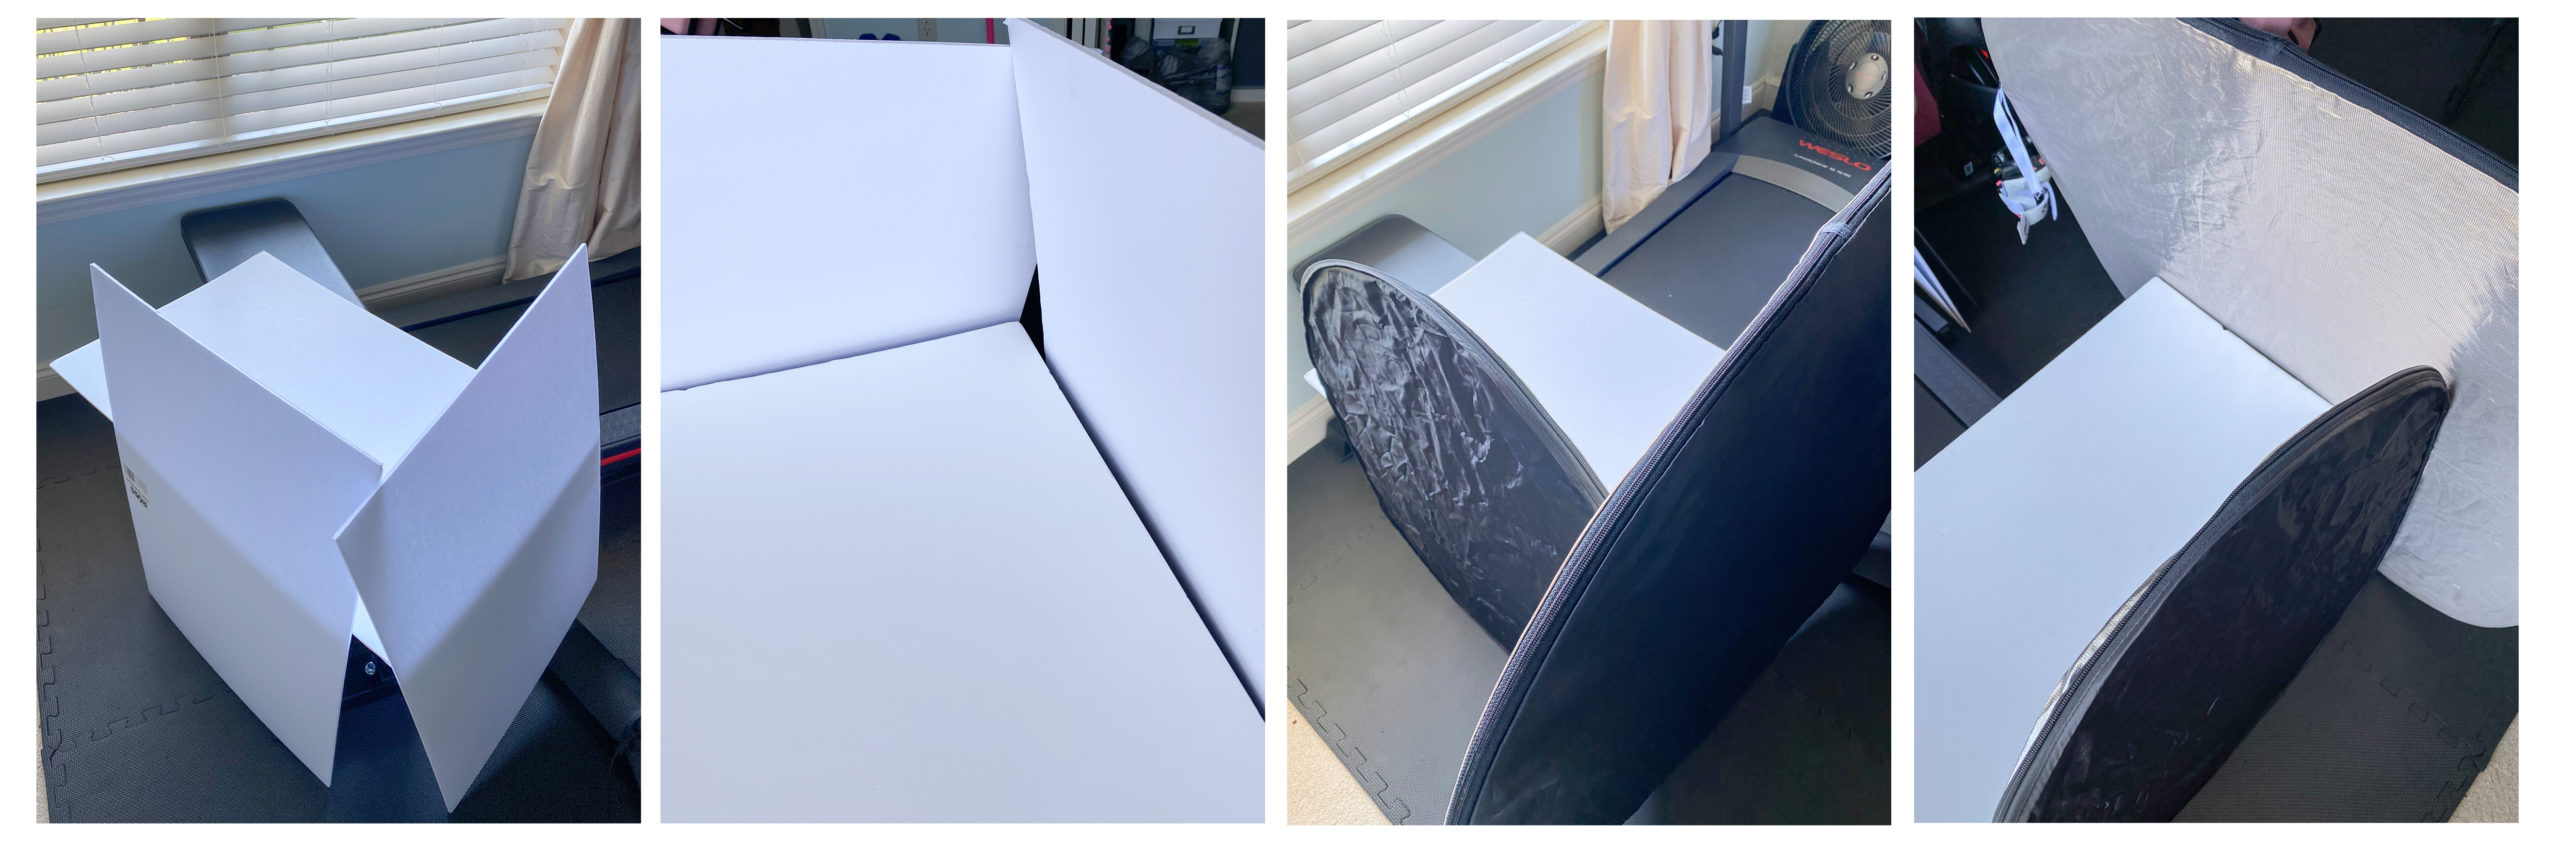
Reflectors are a must. You can find inexpensive silver/gold ones like THIS all over Amazon. I prefer THIS version that creates a more natural light reflection with gold & silver woven together. I like having multiple at hand so I can create the best lighting scenario.
Again, you can definitely use a few pieces of white foam core instead of a reflector.
Pro tip: Looking to add shadow to food photography, etc? Throw a piece of black foam board into the mix.
Okay, let’s talk SHOOTING YOUR IMAGES!!!
DON’T be panicked if you don’t have a nice camera.
DO make the most of what you have.
If I’m shooting product imagery for a client, I’m obviously shooting with my dSLR camera, because that’s my job. If you have a dSLR, use it. That is going to be the best quality images of your product.
If I’m just styling a fun shot or sharing something I love on social media, it’s a much quicker process for me to just shoot it with my phone and edit it in the Lightroom app (using my Sunkissed + Pure mobile presets of course 😉
Smartphones take really great quality photos these days, so if you’re just shooting for your social media, you can 100% get away with shooting great photos with your phone. If you haven’t already, I have a FREE Guide to Great Photos with your Smartphone, which you should definitely check out for more shooting tips & tricks!
The process:
Typically, if I’m just shooting one or two shots, I’ll just hand hold my camera or phone to shoot and bypass using a tripod. If I’m shooting multiple images or a series of images for something like a stop motion video, where every single image needs to be shot from the exact same focal point, I’ll use a tripod.
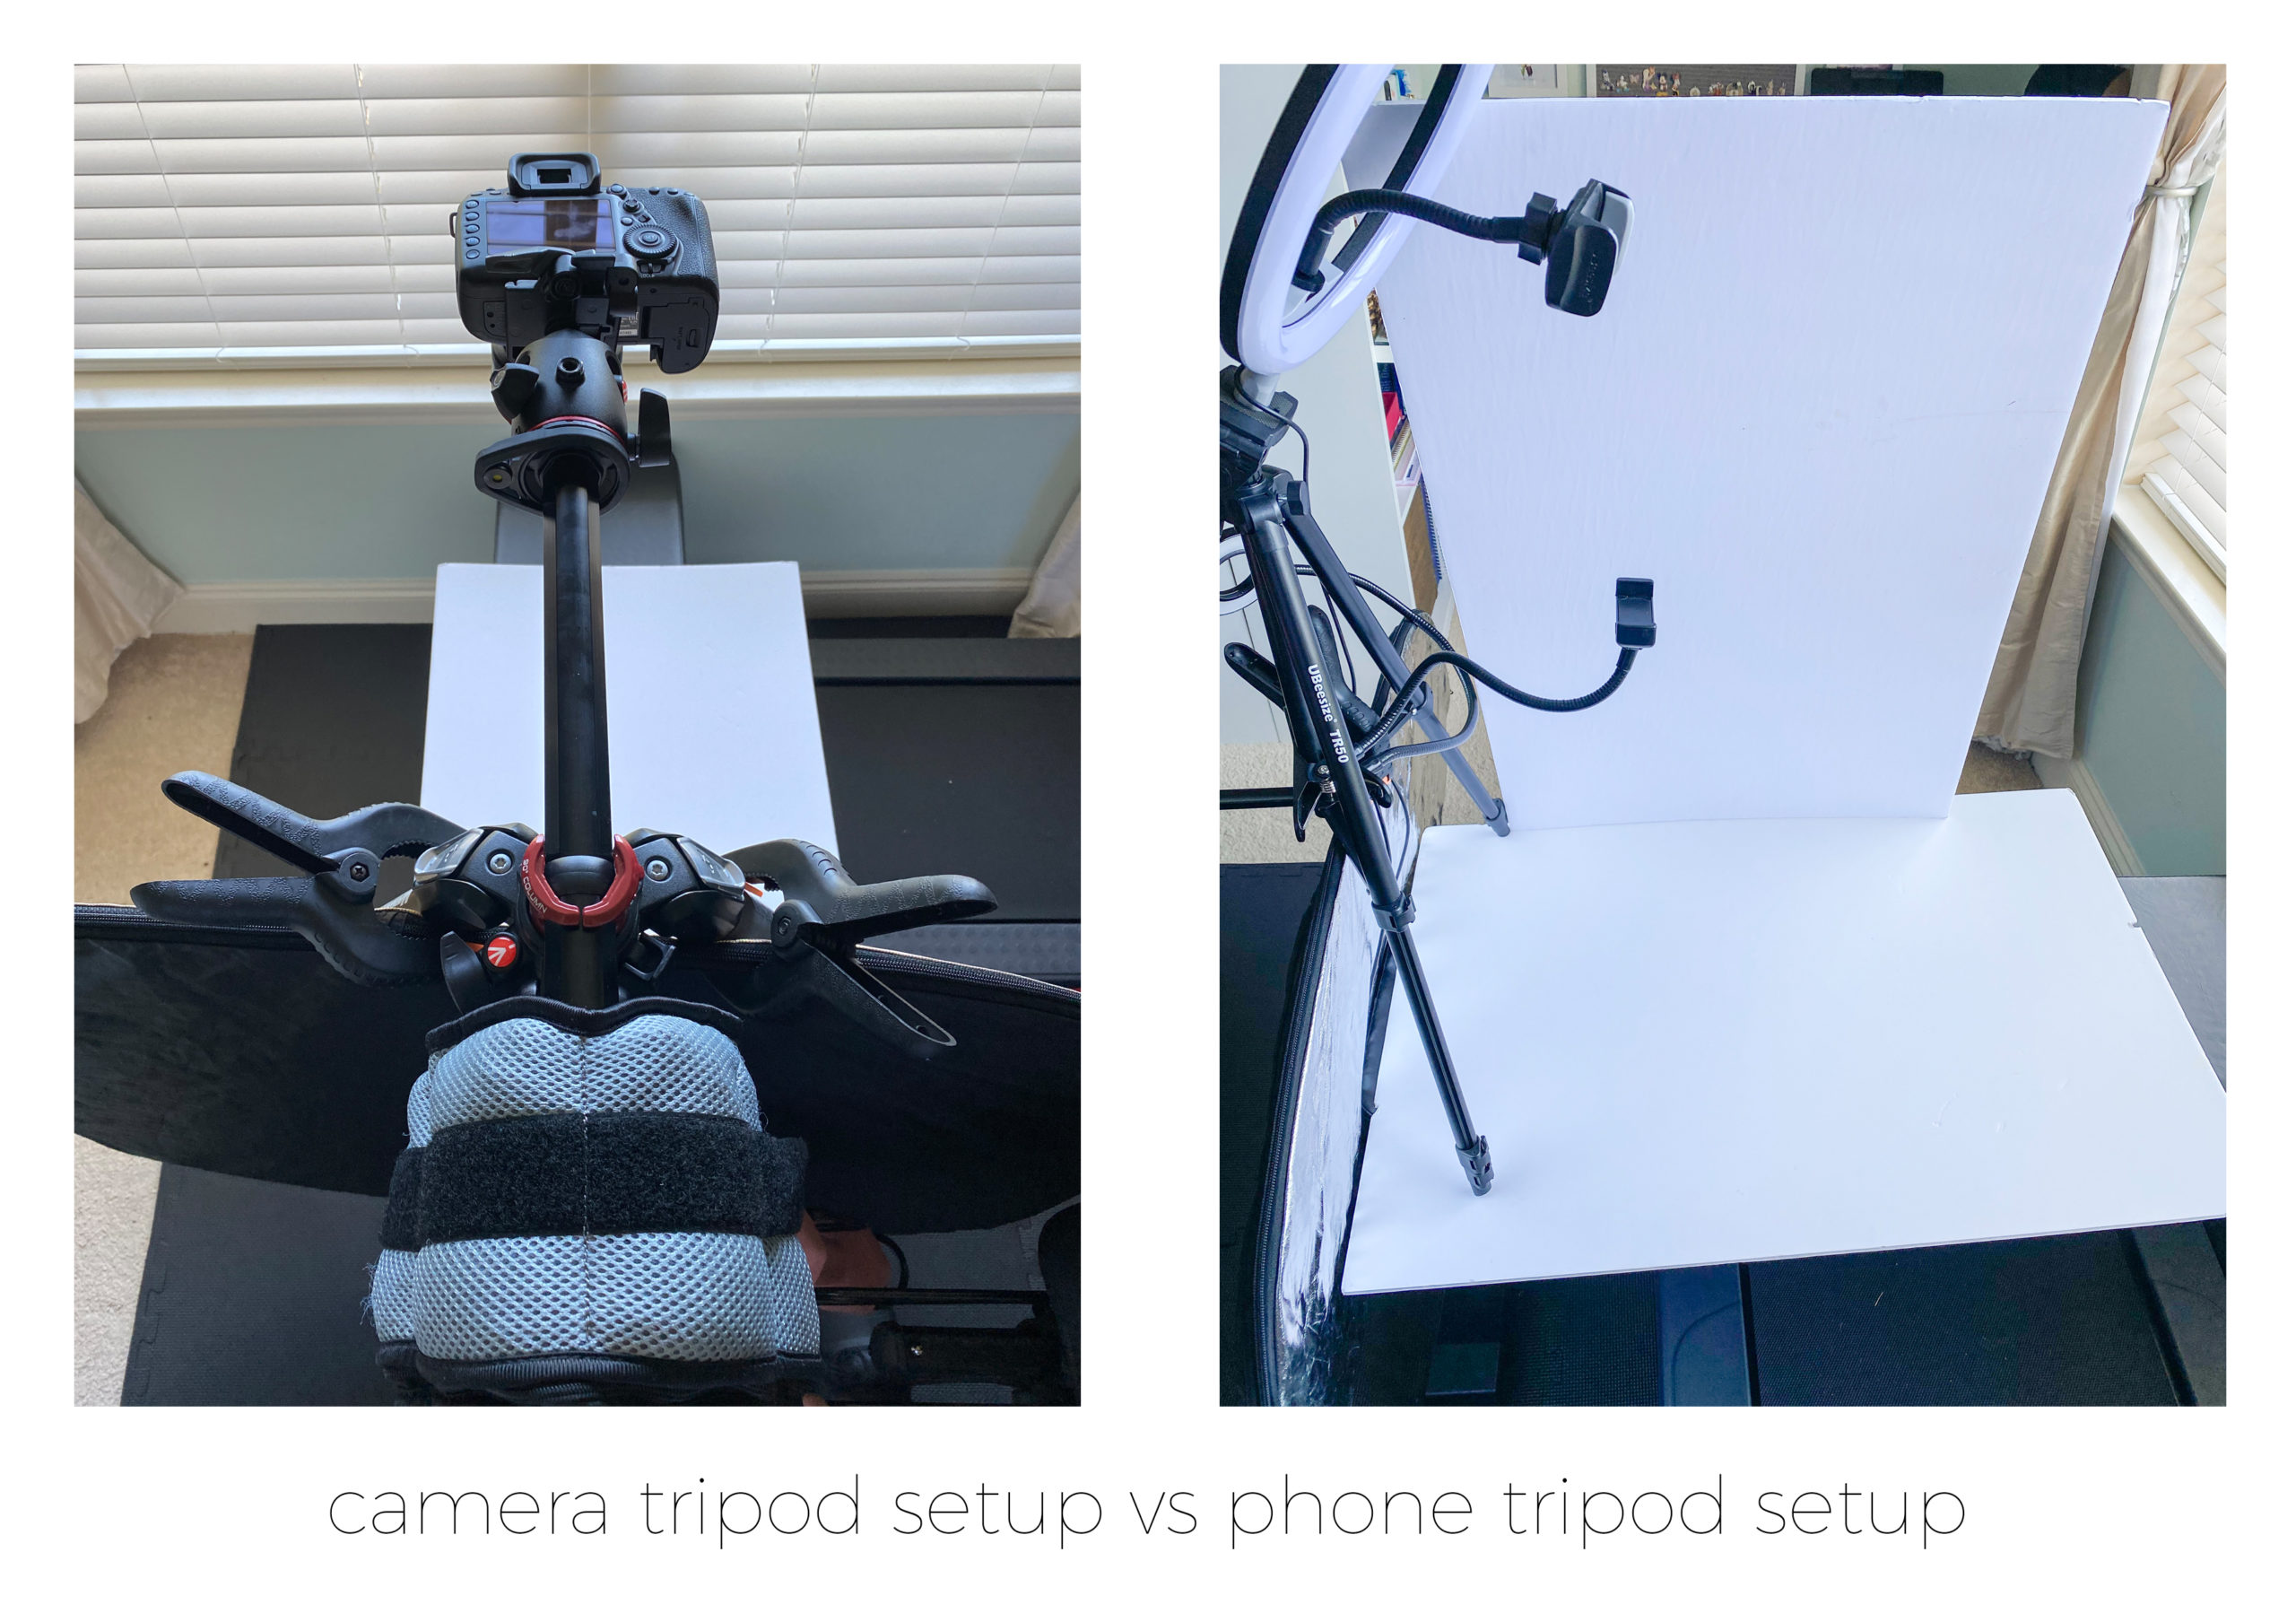
Here’s a look at my tripod setup for my dSLR vs my tripod setup for my phone. The setup of where the reflectors fit in the equation looks a little different than when I’m hand-holding a shot (which I showed above), but this is what works best for me!

 **UPDATE: I went LIVE on Instagram following the original publication of this post and walked through some styling tips and tricks and how I prep for a shoot. There was a request for a checklist to help you prep for a product shoot and I got that setup for you as a FREE DOWNLOAD HERE.
During that LIVE, I also talked about my “On White” mobile preset which I use for editing product shots I take with my phone and you can purchase that preset HERE.
Here are the direct links to all the tools & materials I mentioned above:
Foam core board: I buy the Ross brand from the craft section at Walmart. They are 20×30 in size and super affordable. I like these because I prefer a matte finish board – it’s less reflective. If the board is too reflective it causes “ghosting” which makes your image look less sharp.
Here is a similar type on Amazon, but not as great of a price!
Phone tripod: if I’m shooting a video or need my phone to stay in one spot, this tripod is great. It has a selfie ring light that can be adjusted for varying brightness and temperature of light and it’s super lightweight, so it just keeps things simple. If I’m shooting straight down at a subject, I add this phone clamp arm that is a little longer than the arm that comes on the tripod. This just gives me a little more freedom and it also has it’s own light attached if I’m ever shooting video and just take this smaller option with me.
Basic reflector set: this set comes with clamps, which is super helpful. I love having a silver one particularly for cloudy days. It’s also helpful at times to have a long, skinny one, which fits better in certain spaces, like the legs of your phone tripod.
Gold/Silver “daylight” reflector: a more natural looking light bounced back into your photos.
Extra clamps if you need them. I have this variety pack, which I love because sometimes I need to hold something tiny and sometimes I need a clamp that fits around my tripod, which is quite sturdy.
If you’re going to get serious about shooting product frequently, with a dSLR, here are a few of my must-have tools for shooting pro product images without a fancy studio setup:
dSLR tripod: the most important part of a dSLR tripod for shooting images overhead is that it has an arm that swings out to allow that. You cannot shoot straight down with your camera mounted on top of a regular tripod. I have had this one for years and love it. I’m a huge fan of Manfrotto’s quality.
Tripod weight: this may sound silly, but the tripod gets heavy when shooting straight down and you’ll need to stabilize it. There are weight bags made specifically for this. If you have ankle weights, you can also use those. That’s what I use 🙂
Backdrop stands: This is the set I have and use in circumstances where I’m photographing items (or people) that won’t fit on a 20×30 piece of foam core board. This set is great because it comes with everything you need… the stands, the clamps, the sandbags, the bag to carry it all in. You just need to purchase the backdrops you like. I have white and craft paper, but they come in a million colors and styles.
A shutter remote. You’ll have to check your camera make and model to see what works with your camera. I shoot with a Canon 5d mk iv (almost always with a 5omm L 1.2 lens or a 100mm L 1.4 lens when shooting product) and the Canon RC-6 wireless remote (which doesn’t say online it works for the mk iv, but it works for mine!).
A tether. It plugs into my camera while I’m shooting and has a USB on the other end, which allows me to plug it straight into my computer and see the shot on my computer screen right in the Lightroom app while I’m shooting. That way, I can make sure I’m getting what I need, the light and color are looking good, etc. The camera sees the scene a little differently than our eye does, so this is so helpful and saves a ton of time. You’ll just need to make sure the end opposite the USB is the correct fit for your camera (ie micro usb, etc…. they’re not all the same… the one I had for my previous camera doesn’t fit my current camera)
My favorite reflector. Sharing again. I love it that much. I love this one because it has a panel of gold & silver woven together, which perfectly mimics natural light you’re shooting in. You don’t want weird color casts on one part of the photo that you have to selectively edit in post-processing. Solid gold can be way to warm and solid silver (unless shooting a very cloudy day) can be way too cool to match the light falling in the room.
PS… have questions about styling and shooting product with your dSLR? Click HERE to get on the list to be the first to know about a future class featuring styling, shooting settings with your dSLR and editing images of your product in Lightroom & Photoshop.
I hope this was helpful and gives you some direction for shooting your products! Have questions?? Drop them in the comments below!!


LEAVE A COMMENT
0 Comments